Starlight | VibraCart Pro Setup
Step 1: Install VibraCartPro onto Your Server
- Select the Home page in the Page List.
- Open the VIBRACARTPRO SETUP Pen at the top of the page.
- Uncheck Do Not Publish Content in the Pen stack's settings.
- Select the Setup stack within the Pen.
- Fill in the Database information under the Setup section of the Setupstack.
- I typically use Std. Localhost for a MySQL Database.
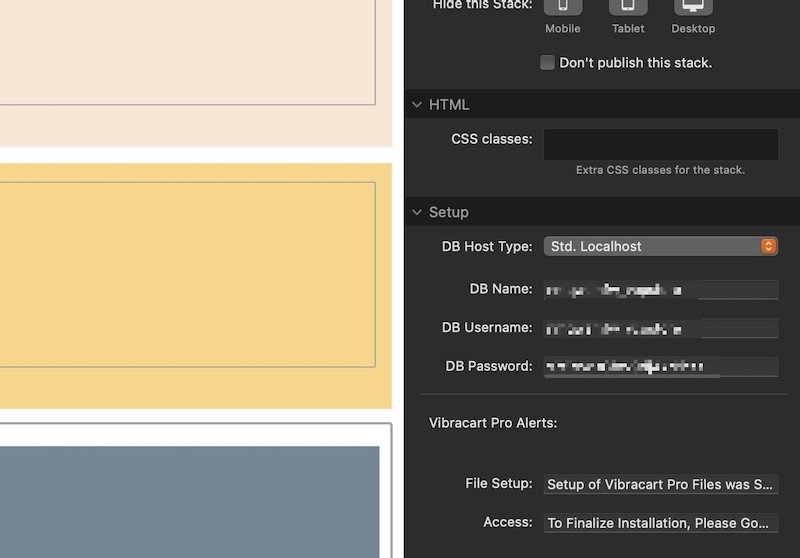
- I typically use Std. Localhost for a MySQL Database.
- Click File and then Re-Publish All Files.
- Re-check the Do Not Publish Content option in the Pen stack's settings.
- Save your file and quit RapidWeaver.
- Re-open the project file.
Step 2: Finish the Server Setup
- In a browser, go to https://www.yoursite.com/vibracartpro/install.php (replacing "yoursite.com" with your own domain).
- Once installation is complete, you can login to the VibraCart Pro control panel at https://www.yoursite.com/vibracartpro/
- Username: admin
- Password: letmein
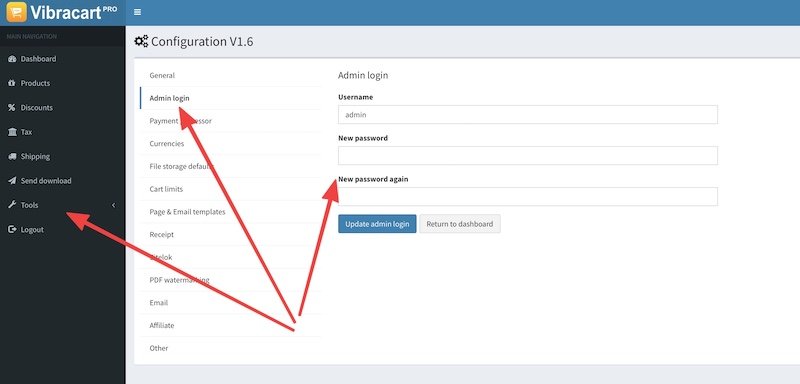
- Navigate to Tools - Admin login and set a new password.
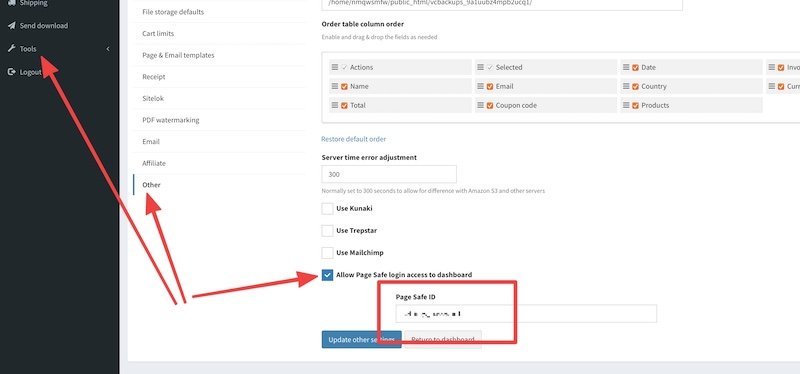
- Navigate to Tools - Other and check the box next to Allow Page Safe login access to Dashboard
Step 3: Set Up VibraCartPro in RapidWeaver
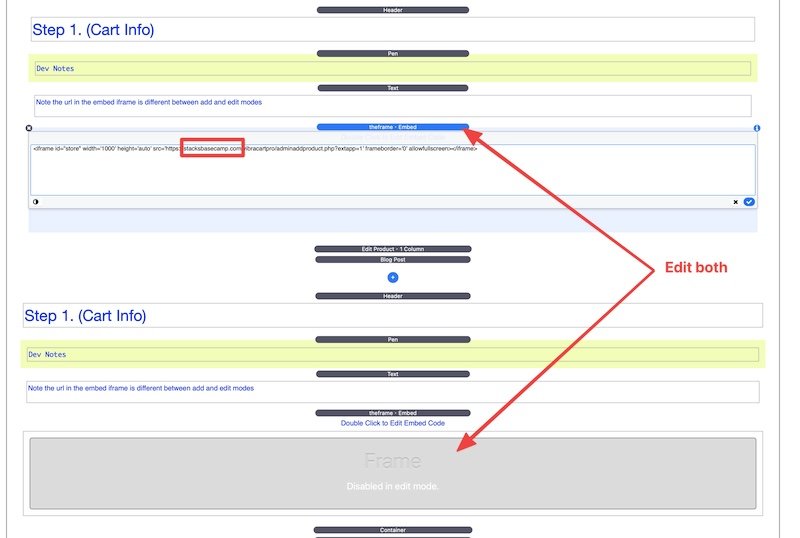
- Select the Admin - Store Edit page in the Page List.
- Scroll down the page until you see the Step 1 . (Cart Info) header.
- Double-click the iframe stacks and edit the URL to be your website.
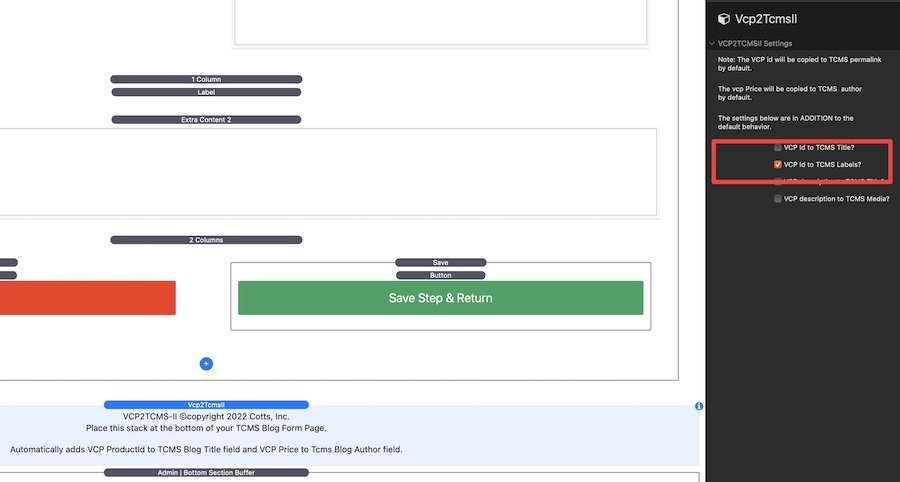
- Starlight uses the VCP Id to TCMS Labels? setting in the Vcp2TcmsII stack. You can change this, but then you would need to change some of the logic of your form.
