Starlight | General Setup
Step 1: Setup Your Project File
- Unzip the Starlight project file and open it in RapidWeaver.
- Click File - Save As... and name your new project file whatever your website is going to be.
- Under General, set the Web Address and Title of your website.
- Under Web Icons, set your icons for your site.
- Under Publishing, set up your FTP using the information from your hosting provider.
Step 2: Add Total CMS License
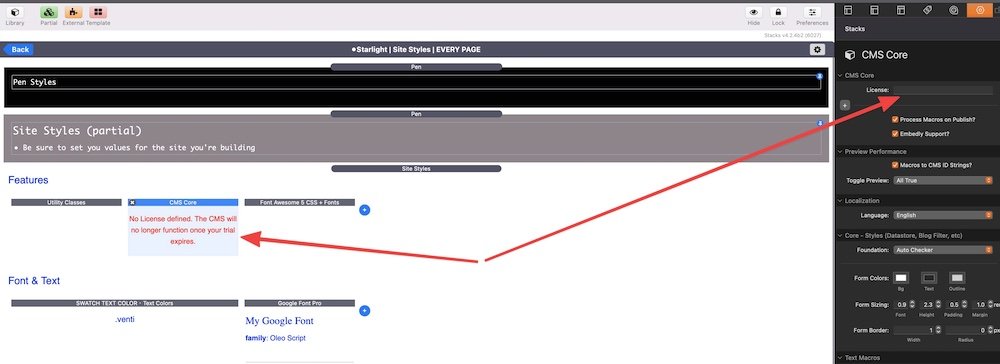
CMS Core Swatch
- Select the Home page in the Page List.
- Double-click the Starlight - Site Top partial under the VibraCartPro Setup Pen.
- Open the Site Top - Front Facing Pen.
- Double-click the Starlight | Site Styles | EVERY PAGE partial and open the Site Styles (partial) Pen.
- Select the CMS Core Swatch and enter your Total CMS license.

Admin Core
- Select the Admin - Home Page page in the Page List.
- Scroll down to the bottom of the page and double-click the Starlight - TCMS Admin Core partial.
- Select the Admin Core stack and type in your Total CMS license.
- Click the Register CMS button above where you typed in your license.
- Click the Back button to get out of the partial.

- Preview the page by hitting Command+R.
- Click the Register button
- Click File and then Re-Publish All Files.
- Once all files have been published, follow the same steps 1-5 from above, but this time uncheck the Register CMS button.
- Back out of the partial.
Step 3: Setup the Admin Portal
- Navigate to the Admin Portal (www.website.com/admin)
- Login using the supplied Page Safe or Protect password (demo123@).
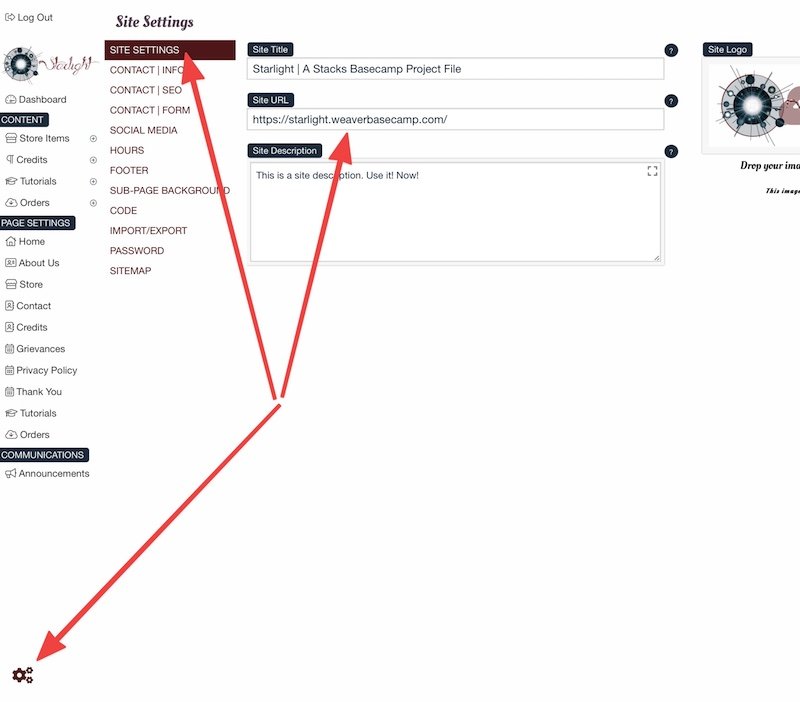
- Click the Settings button in the lower-left corner of the screen.
- Under SITE SETTINGS set the Site URL to be your website's URL and be sure to include the "/" at the end.

